Monday, December 23, 2013

Jim’s Quilt

One of the women in my sewing group told me that her husband wanted to make a quilt. Next thing I knew, he had finished the top.
He said he had grown up with quilts and had always loved them. Now he almost has one. Onto the basting, and quilting!
jims quilt
Those autumn colors are going to look beautiful in their mountain home.

Friday, December 20, 2013

Make your own jelly roll race roll

Our quilting group at church is prolific, and as such we end up with a lot of scraps. Recently we cut our scraps into 2.5 inch strips, sorted them by color or theme and sewed them together to make a “home-made” jelly rolls. We scheduled a sewing day and had a lot of fun stitching.
Long stripIMG_3758[1]IMG_3757[1]
jely roll christmas
With left over strips from my Christmas placemats and napkins I made a Christmas quilt for a door prize at our church's annual neighborhood children’s Christmas party. The woman who won the quilt was thrilled.
In case you want to try making your own jelly roll, here’s a calculator, or just use the chart I worked up for our group. Our group is hooked on making them. Fastest charity quilt ever!
A commercial jelly roll has 40 strips in it, cut the width of fabric. This will make one long strip of about 1600 inches long which will make a quilt about 50-52” wide by 64” long. If using a commercial roll, make sure you cut about 18” off one end of your first strip. Jenny Doan has a great video on YouTube.
To make the same size quilt from random 2.5” strips, you will need 1600 inches of fabric after sewing the ends together. Since the strips are random length, no need to make any cuts off the end.
For a Baby quilt, or a 32” x 32” quilt, use 13 and one half strips from a commercial roll. If using random strips, you’ll need 560” of strips sewn end to end. If desired, you can add borders to make it larger. (You will only sew these strips 4 times)
To make a Jelly roll quilt larger than 50X64”, add 42” to your roll for each inch of desired width. See chart below for approximate measurements
Desired length of quilt Desired width of quilt # of continuous inches needed
32 32 560
64 50 1600
64 55 1814
64 60 2028
64 64 2184
70 64 (stripes will be vertical) 2628
These are approximate lengths, but give a fair estimate of the amount of fabric needed.
Remember that in a jelly roll quilt, the width doubles each time you sew a seam
First seam 4.5” wide
Second seam 8.5” wide
Third seam 16.5“ wide
Fourth seam 32.5 “ wide (stop here for baby quilt)
Fifth seam 64.5” wide.
To make a king size quilt you will need approximately 6400 inches of strips sewn end to end! If you had that much fabric, you would make a sixth seam for a quilt that measured about 128” long by 100 wide. Obviously, if you wanted it wider, you would add more length to your strip.
When storing your strips I would suggest folding or rolling them with the two ends on the outside so you can immediately begin sewing. We had a hard time with the rolls twisting as we sewed the first two strips together.

Wednesday, December 4, 2013

Four Quick Quilts

Try saying that fast seven times.
We had some fabric remaining from our sanctuary quilt projects, so rather than stash it, I made some quick quilts for people in our congregation who are no longer able to attend church.
st. andrews cross
This one was designed like the sanctuary  quilt which I made for our congregation’s 90th anniversary. I did free motion spirals in the gold and dark blue sections, and did channel quilting 3/4” apart in the border. This quilt measures about 45” square.
quilting detail St. Andrews cross
These two medallion quilts measure about 40” square. I did cross hatch quilting on them, one with dark blue thread, the other with gold thread.
medallion1

medallion2
This quilt started out as the back for the St. Andrews cross quilt, but when I took it to my Wednesday morning sewing group for help in pin basting, they convinced me it would look beautiful on its own.
stripe
There was a lot of negative space and I decided to fill it with serpentine stitching. The stitching rows are 1.5” apart.
quilting detail striped
I did all the bindings by machine. Although I love a hand sewn binding, I’m getting better at machine binding. I think the key is to use a very skinny thread in the bobbin that blends with the backing fabric. In some of these I used Superior Bottom Line, a 60 wt. poly thread. In others I used Wonderfil Invasifil, a 100 wt. poly thread.

Sunday, December 1, 2013

Iron Bowl Sewing Machine

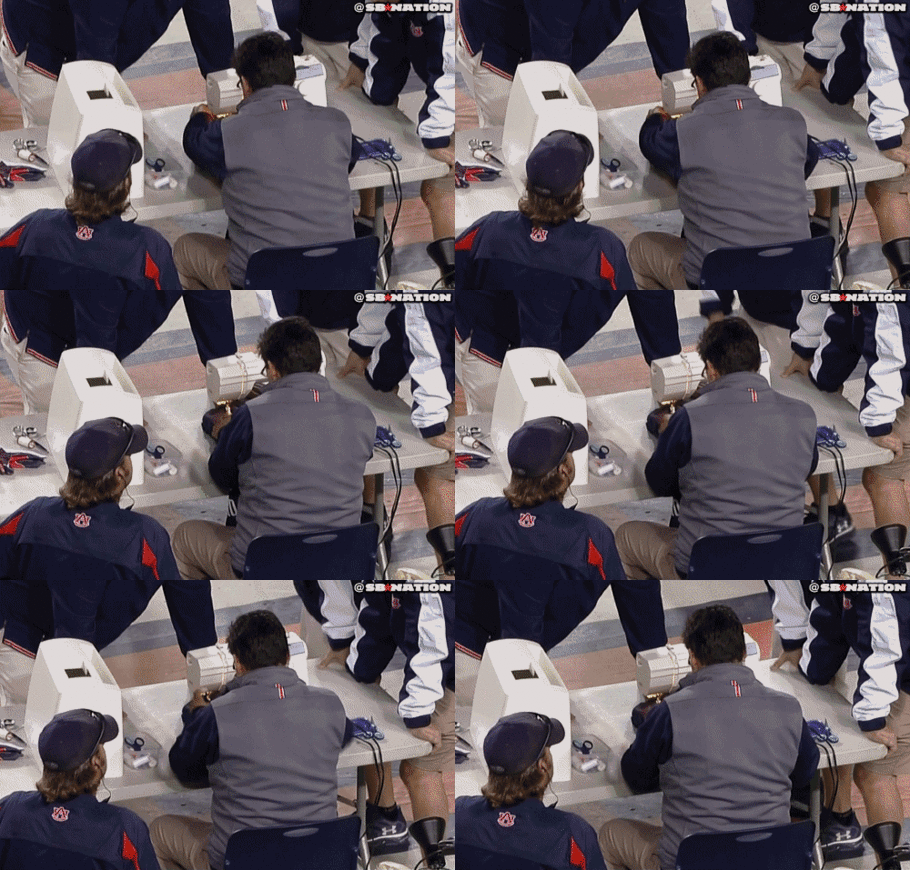
We ate a lot of food and watched a lot of sports events this weekend. The Auburn v Alabama was one of the most exciting. If you missed it, someone on the Auburn equipment staff pulled out a sewing machine and repaired a jersey during the game. This guy looks like he knows his way around a machine.
Sewinauburn_medium
The Twitter universe lit up, and the sewing machine has its own twitter account with a myriad of puns. If you are on Twitter, you can follow at @ausewingmachine
Now back to eating leftovers

Friday, November 15, 2013

Paloma Quilt

It’s finished!

on the bed

The back

back

This was a commission quilt for a dear friend.  She told me that she liked soft colors, something that looks like it has been out in the sun for a couple of weeks then beaten with a rock. 
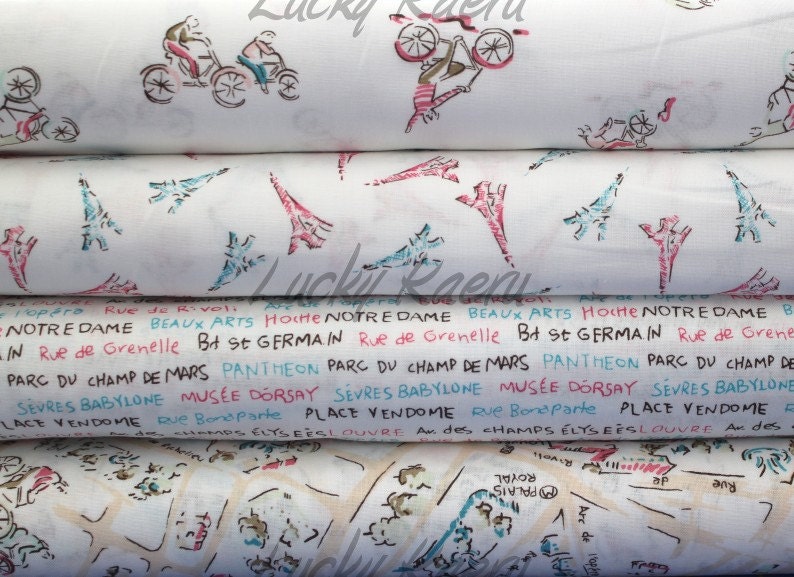
So I started looking for fabrics and came upon this gorgeous collection from Dear Stella, Paloma.

paloma collage

I added some fabrics from an older Dear Stella group, J’Adore, and even though it’s an older collection I managed to fine enough yardage of the Eiffel Tower for the backing. The low volume prints from Lizzy House Pearl Bracelet collection and Kate Spain's Sunnyside collection made the balance of the palette.


It wouldn't be a Susan quilt unless I added a lot more fabrics, so I used the color coordinator tool on Hawthorne Threads and selected some additional prints. I also went through my stash and pulled several fabrics. the pattern I selected was the Kitchen Windows pattern from Elizabeth Hartman’s book The Practical Guide to Patchwork.
Designing the blocks was fun as I fussy cut the fabrics to fit the pattern.
I quilted it in a spiral stipple using Isacord white.

On Thursday I had the opportunity to deliver the quilt in person. A mutual friend accompanied me and we had a wonderful lunch together in Vero Beach.
happy recipient2
Vero beach becky susan lauren

Wednesday, November 13, 2013

Barcelona Quilt


I just found a post about this fun quilt. I intended to publish it in September.

It’s finished. The scraps I received from Brigitte at Zen Chic have been transformed. I decided rather than choosing a formal pattern I’d just have fun with the scraps and make wonky log cabins. I added some prints from the Comma and Architextures collections and threw in a few solids.
completed barcelona

Back

back

Quilting detail

quilting detail

Specifics
Fabric: Barcelona and Comma by Zen Chic, Archetextures by Carolyn Frielander, Mama Said Sew by Sweetwater, Bella solids by Moda, assorted stash fabrics
Pattern: Wonky Log Cabin
Batting: Hobbs washable wool
Thread: Superior Fantastico, Free motion quilting using Bernina 630
Size: 54” x 54”

Sunday, November 10, 2013

Scrappy Broken Dishes Quilt

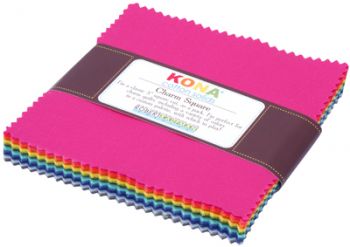
Awhile ago I purchased two of Laura Gunn’s Edges charm packs. I think I had a plan for them, but they languished in my closet. I then bought a charm pack of the new summer 2013 Kona solids. Charm packs are 5” squares sold by manufacturers to market new lines.

Kona® Cotton, Summer '13 palette
I’ve been working on an lovely queen sized quilt which I just finished (post to follow) and I just wanted to sew something quick and easy.
I sorted through my scraps and found some orphan whites and cut 5” squares.  From the charm packs I picked out the colors of spring and summer and chose to make a baby quilt in the timeless broken dishes pattern. I have a lot of squares left over in an autumn palette which would make another nice quilt.
I haven't quilted it yet, it will go to my church group and will likely end up going to our hospital’s neo natal unit.
IMG_3663[1]
I love this pattern, there is so much movement. The top measures 41" square.

Thursday, November 7, 2013

Lemon Pepper Quilts

On a recent trip to the Pacific Northwest I had the occasion to stop at the wonderful Stitchin’ Post quilt shop in Sisters Oregon.
Stitchin post
It’s a beautiful quilt shop and I found a pattern named Lemon Pepper by a designer I didn’t know about, Kenna Ogg of Madison Cottage Design. I bought the pattern and a fat quarter kit to make a throw sized quilt.
Here’s a photo of the pattern (she designs other patterns too)
Madison Cottage Design Lemon Pepper
When I returned home I dug through my stash and had enough grey, mustard and black to make two quilts. One for me and one for our local hospice. The quilts were easy to make, and could be handled by a beginner. Any color way would work. I’m thinking of making it in green and yellow.
twins
The quilts measure 63”x63” and are machine quilted. I did one with multiple lines of diagonal quilting (love those Riley Blake geeky glasses)
diagonal straight line quilting
The other one I did in a 4” cross hatch.
cross hatch quilting
I machine stitched the bindings on both quilts.
Besides having a wonderful quilt shop, Sisters, Oregon is at the foot of the Cascades. On our way out of town we captured this unforgettable image. The cowboys, horses and dogs are metal sculptures.
sisters cascades

Monday, October 28, 2013

Taking it to the Floor

I haven't made a queen sized quilt in a while, but if I move most of the furniture out of my studio I can pin baste it on the floor. Any larger than a queen, I have to take it to my garage floor. Which of course would need a thorough washing…and where do you stop?
The quilt began with these low volume fabrics
on the cutting table
Now it’s ready to pin and quilt
ready to pin
This is a commission quilt, and it has been fun working in colors I don’t normally use. The white strip near the top is a shaft of sunlight, not a fabric variation. If you are looking closely, it's also laid out upside down.
I won’t get it quilted for awhile because I have an opportunity to go to the Houston quilt show with my sister! WooHoo!

Sunday, September 22, 2013

Sacred Threads Exhibition 2005

This was the first quilt I entered in the show, way back in 2005.

sacred threads first entry

Our quilting group at my former church undertook a huge project to make 25+ full sized bed quilts for a Christian retreat center in Bolivia. We had a blast hand painting several bolts of PFD fabric, using Pebeo Setaclolor transparent paints and salt. The whole congregation and many people from the community were involved. You can read more about the project here. If you want to know the technique, this link to Phil Beaver’s instructions will guide you.

Even though we had a designer who designed the quilts for maximum use of the dyed fabrics, we still had lots of scraps, most were less than 2” wide. To celebrate the event, I made this string pieced quilt. It was accepted in the Sacred Threads 2007 exhibition in the category, Brotherhood.

It has graced the walls of my studio for the past seven years, but it’s time for a change. Eastminster Presbyterian Church of Evansville, the congregation that made this project possible is experiencing a milestone this fall. The pastor is celebrating twenty-one years with the congregation. A celebratory banner is in order.  The church has lots of wall space for display. It will find a home there, and I still have my sewing machine cover and a bag of scraps.

finished

Wednesday, September 18, 2013

Sneak Peak

Shhh, it’s a commission quilt for a friend. She says she likes soft colors…colors that look like they have been in the sun a few weeks, then beaten with a rock. Those of you who read my blog know I love to quilt with bright colors and graphic designs but this has been a welcome change.
on the cutting table
I don’t know if every color will make the final cut, but it sure has been fun playing with the fabrics.

Saturday, September 14, 2013

End of an Era

Last week I finished the last of my sock monkey fabric, today I finished the last of my giant Gerber daisy fabric.  I made at least seven baby quilts from this pattern as well as a queen sized bed quilt.
flower quilt
The fabric is no longer available, so I’m going to have to go shopping. My other quilts in this series were quilted with a cross hatch design, but I decided to try the serpentine stitch for this one. Here’s a link to last week’s post about the  serpentine stitch. It’s from Bernina, but the multi-point zigzag stitch is a utility stitch on just about every sewing machine. To get the serpentine look, it’s all in a matter of adjusting the width and length of the stitch. I quilted the vertical rows 1 1/2” apart. I used Superior Bottom Line thread in the top and bottom. It's a very thin thread which just gives texture.
closeup2
Back view
front and back
It’s also the last of this Henry Glass print too. Sad smile
I really like the look of V and Co.’s tutorial on the oversized Dutchman’s puzzle block. Maybe this is my next series? Click on the photo to go to Vanessa’s tutorial for this pattern.

Thursday, September 5, 2013

Machine Stitched Binding

I have hand sewn my quilt bindings for years, but recently, my wrist has been causing some problems so this week I decided to give machine binding a serious try.
Here’s a big thank you to Jan McKinney who showed me how she binds quilts for customers at the Sew and Quilt Shop in Bunnell.
Rather than using a straight stitch, or a zigzag stitch, she uses an adaptation of the multi-point zigzag stitch (or as Bernina calls it, a running stitch) to create a serpentine stitch.
stitched binding front
Begin by stitching the binding to the back of the quilt. This is the reverse of how you would do it if you were hand stitching the binding. Fold the binding to the front and select a multi-point zigzag stitch. Lengthen the stitch length and make the width narrower. You’ll need to practice on some samples, but I set my stitch length at 1.6 and my stitch width at 2.0. There are endless variations to try.
Here’s how it looks on the back. I slipped off the edge in a couple of places, but with the serpentine stitch it’s really hard to tell.
back of binding2
Here’s a tip sheet from Bernina about using the running stitch as a quilt stitch.
The results? Three finished baby quilts.
3 baby quilts

Friday, August 16, 2013

Comma Again?

comma again front
I have my favorite fabric designers, and Brigitte Heitland of Zen Chic is in my top ten. Her line Comma is so simple, yet so striking. I came by a layer cake of this line and found a pattern on the Moda Bakeshop. It’s designed for use with a layer cake fabric bundle, but you you can use yardage just as easily. Beginners, don’t fear, this is a very simple quilt. I did add more blocks to make the quilt a little larger than the pattern specified, but it is even easier that the ubiquitous Yellow Brick Road pattern. It’s available free here.
I am having fun with piece backs these days.
better comma again back
Since the quilt design was simple, I decided to experiment with an all over quilting design that was a new design for me, Pebbling. It’s not perfect, but I did have fun doing it. What I especially liked was using Isacord 40 weight polyester thread. This is the thread Leah Day recommends, and it is available in many local quilt shops and online. I’ve been using Superior Thread for a long time, but this last quilt has made me a convert.
pebbling

Monday, August 12, 2013

Zen Chic Comma Baby Quilt

To anyone who is not a fabric enthusiast, that title means nothing, but Brigitte Heitland is the designer whose company is named Zen Chic. She has designed several commercial fabric lines, and one of my favorites is Comma. One of the projects Brigitte featured on her designer page is this one by Emmaline.


I liked the mustard and grey fabric selections and decided to make a similar one. Here’s my version.

front comma baby quilt

back of comma baby quilt

Fabric : Comma from Zen Chic, back is also from the Comma line, Nigella.

Construction: Cotton batting and Signature cotton thread

Size: 38” x 59”  The blocks are about 6” square

Quilting Design: straight line quilting 1/2” apart

Now a word about my walking foot. I do most of my quilting with a Juki TL98E which I have had for about eight years. I like everything about this machine except the design of the presser feet. I have changed or adapted each of the feet that came with it.  The walking foot has no guide bar for aligning your stitches. I've searched at quilt shows, talked to sales reps, and a walking foot with a guide bar does not exist for this machine. 

Here’s what I finally rigged up.

walking foot adaptation

I taped a guide bar from another machine to the Juki foot. Really now, Is that the best Juki can do?