Monday, October 29, 2012

Autumn Leaves

We were traveling for a couple of weeks in New England. The leaves were gorgeous, the hikes invigorating, the covered bridges were picturesque, and the decorations were, well see for yourself…

Here are a few of my favorites from the Pumpkin People Project in Jackson, NH 

Fisherpumpkins American Gothic ZZ Pumpkins 2

 Village Pumpkins 2

And from Damariscota, Maine, some of the images from their Pumpkin Festival

Rotary Pumpkin

Octopus Pumpkin

Bat Pumpkin Bunny Pumpkin

Big Bad Wolf Pumpkin

Sunday, September 30, 2012

Funeral Pall

In the spring of 2012 I had the opportunity to take a 6 hour class from Diane Hire, an improvisational quilter. I learned techniques in her class, but I did not apply them until our sewing group was commissioned by our pastor to make a funeral pall. Here’s a photo of a pall from a church supply company. cokesbury pall

Our initial thought was that we wanted to create a piece of art that would incorporate not only Christian symbolism, but also give the congregation an opportunity to be a part of the finished work. To that end, we asked people to give us fabrics in golds, oranges, and yellows for the cross, and whites and off-whites for the background. The variety of fabrics we received was amazing. We received, tablecloths, pillowcases, T-shirts, ties, hand made lace, upholstery fabric, bridal fabric, and more. We tried to capture the individuality of each submitted fabric.

A plan was created and the group began to sew blocks. The blocks were 4.5” squares and were intentionally created to be wonky. most of the blocks contain at least ten different fabrics. It was labor intensive. Last week the blocks were completed and we laid them out on the floor. We spent a lot of time arranging and re-arranging until the design pleased us.

photo (11)

completed view

At this point, the group project becomes an individual project as the quilt is assembled and quilted. I’ll keep you posted.

Monday, September 17, 2012

Fabric Luggage Tags Tutorial

Here’s a way to use up scraps of fabric to make something every traveler will appreciate.
What you will need:
  • Two pieces fabric for front and back of tag 4 1/2” x 2 1/2”
  • Fabric for strap 2”x 14” (or you could use a ribbon)
  • Timtex or other heavy weight stabilizer 3 1/2” x 5 1/4”
  • Clear plastic vinyl 2 1/4” x 4” (Fabric stores sell this, but I cut up a vinyl blanket bag)
  • Cardstock for name/address 2” x 3 1/2”
  • Sewing machine foot for sewing on plastic
supplies

For my machine, I used a Teflon foot. Your sewing machine dealer will have a recommendation for your machine.  My regular sewing foot was not cooperative.
Make the strap by folding the 2”x14” strip of fabric in half lengthwise. Press a crease and open, then fold in both side edges to meet in the center and fold again. Stitch close to the edge on both sides.  (You could use a 14” length of ribbon.

press in half lengthwise
 press to center
stitch strap2

Attach your specialty sewing foot to your machine and stitch the plastic around the two sides and the bottom.

sew on vinyl

Remove the specialty sewing foot and attach fold the strap in half and stitch to the right side of the fabric at the top of your tag. The open edge of the pocket will be below. So you don’t sew over the strap when stitching front and back sides together, tuck the end of the strap into the vinyl pocket.

stitch on strap

With right sides together, stitch around the two sides and the top, leaving the bottom open

sew three sides

Turn right side out and use a chopstick or other tool to get your corners sharp
Insert the piece of heavy weight stabilizer into the tag through the open bottom and tuck in the back and front of the pocket to close and conceal.

insert stabilizer

Topstitch all the way around your tag about 1/8” from the edge. (Pull strap out of pocket before topstitching the top)

top stitch

Personalize the cardstock and insert it into the open pocket. Here; the ones I made this morning.

finished

Other uses:
  • Gift tags for packages
  • Place cards for holiday gatherings
  • Place cards for wedding reception tables.
What’s not to love about this easy project!

Friday, September 14, 2012

Four More Projects for Handmade Holidays

This past weekend the youth at our church had a lock-in. Part of the event was making some items to sell at a Christmas bazaar.  I had four projects planned, coasters, luggage tags, gift pockets, and decorative gift bags. Many of them had never operated a sewing machine before, and I was excited to see them learning.

sewing instruction
sewing coasters
youth painting pockets

Here are some of the finished products

some finished products

coasters and gift pockets

Monday, September 3, 2012

Handmade Holidays—e-reader covers

Here’s a project that’s simple and adaptable to a variety of fabrics and techniques.

e-readers and clutches
The pattern is sized to fit the Nook and Kindle e-readers. The pattern could be easily adapted to make an iPad or smart phone cover. I used this tutorial which I found to be an excellent guide. For the two top bags I used fusible fleece and did not do any additional quilting. I also adapted the pattern to add an interior pocket in case the user wants to carry it as a clutch.

The one at the top used a piece of fabric a friend gave me. She purchased at a screen print factory in Hawaii in the 60’s. The fabric was luscious. It will be a gift for a woman who is taking a round the world cruise in January. I had never made a yo-yo before, but the bag told me it wanted it (see below).

The second one is made from a recycled  pair of jeans and a scrap of batik fabric I just loved.

The bottom one is made from a piece of hand stamped batik from Mali. I purchased it at a French Connections, fantastic fabric and art store in Pittsboro, NC.  I quilted it using a pieced scrap of wool batting and a metallic thread. I made an extra one to keep for myself and use as a clutch handbag.

For the closures I used a new to me product, fusible Velcro. Lazy Girl Designs has a product review here. I echo everything she says, the product is fantastic. The only down side is that it takes 90 seconds of heat application with an iron at the hottest setting to fuse to the fabric. I recommend using  press cloth to avoid scorching the fabric. Ask me how I know…the yo-yo. When accidents happen, embellish, embellish, embellish.

Wednesday, August 29, 2012

Flat iron caddy

I found this idea posted from this website listing easy DIY projects.

Make a Travel Flat Iron Holder Out of a Pot Holder

I needed a project some novice sewists and this looked simple and practical. Indeed it is, but finding the cute pot holder presented a challenge. I found some I liked for $6, but I needed a less expensive option. The ones for less had undesirable kitchen images, like roosters and cooking pots. Then one of my brilliant sewing companions suggested using one of the kitschy ones and sewing the edges so the design was on the inside.

Off to Dollar Tree where I found them at two for a dollar. But how to embellish, they looked so plain.
I pulled out my scraps of fabrics that had been fused to Wonder Under, and started to play.
Here are two samples, one was turned inside out and fabrics were fused and stitched, the other used a larger piece of fabric which I fused right over the image, then did a zigzag stitch with variegated thread around the edge. 

 caddieswith iron

Glasses case anyone?

Serger Envy

My sister bought a new Baby Lock serger that does the wave stitch, and I am jealous. Not jealous enough to actually purchase one, because I have a wonderful Huskylock 936, but I’m just sayin…

I went with her to her serger club where everyone had one of these fantastic self threading wave machines. My envy dropped a little bit when most of the women in the class had trouble threading their machine, changing needles, etc. but I digress. My sister has never owned a serger before and has had this serger for less than a month, and here’s what she’s done.

Here’s the black and white ensemble. She made the skirt and refashioned a black tee from her closet by cutting off the hem, and adding a black and white wave stitch to the neckline, bottom hem and sleeves. The hem of each of the skirts she made are finished just using the wave stitch.
black and white2 black and white

Next up a fantastic multi-color skirt
multi skirt white blouse closeup

She made the skirt, then refashioned a blouse by cutting off a white camp shirt from her closet and adding wave stitching to the sleeves and the new shortened hem.
Here’s a combo made from Robert Kaufman’s Stockholm fabric she didn’t cut off the tee from her closet, but did add wave stitching at the sleeves…and made a tote too! Brava!

blue and brown


Saturday, August 25, 2012

And the winner is…

Nancy who commented: “Cute bag just right to store all manner of treasures. I like the colors you chose. I'm a follower. Going to check out the pattern, too. Thanks for the opportunity.”

I’ll be sending this bag to Nancy as soon as she emails me her address.

susans bag2

If you missed out on the bag, here’s the tutorial to make one for yourself.

Thanks to all of  you for your kind and generous comments.

Tuesday, August 21, 2012

Drawstring Bag Giveaway

It’s time for a giveaway. Patti Wagon and I are having a giveaway for patchwork drawstring bags. By following the contest rules on this blog, you can win this bag, then head over to Patti Wagon for a chance to win a different drawstring bag.
The bag on this blog measures 11” wide by 13” tall and has an interior pocket. The ties on the drawstring are long enough to go over your shoulder, but can certainly be replaced. For directions on how to make one, click here.
susans bag2
Enter a comment on this site for one chance to win. As one of my followers or as a new follower, you'll get another chance.  To my readers who know me personally, you have to make a comment on this blog. Although I'd love to hear from you, sending me an email, text or phone message won’t give you a chance to win.
The contest will end on Saturday, August 25 at noon Eastern daylight time.  The lucky winner will be selected by random drawing posted here later that day.  If your name is selected, you have 48 hours to respond. If the winner doesn't respond with a mailing address, I'll pick someone else who then has 48 hours to respond.
Here’s the bag you can win at the Patti Wagon blog.
pattiwagon bag 
The fine print: Comments with inappropriate content or comments from spammers will be removed at the discretion of the blog owner, and will not be eligible to win. Prizes will be mailed by USPS. I will not be able to send a package outside the continental US.

Sunday, August 19, 2012

I love Threads!

I am a quilter. I love quilt shops, I love fabric, I live quilt shows, I love to make quilts, but what I really love to do is machine quilting. And for that, you have to have quality threads.

This Sunday was youth Sunday at our church, our associate pastor wanted a colorful stole for the event and one of the women in our wrapped in love group made a gorgeous stole for her. The fabric she chose is a “cheater fabric” from Malka Dubrawski’s Stitch in Color line. The patchwork and stitching lines are printed on the fabric. My challenge was to quilt it such that the new quilting lines didn’t interfere with the printed lines. The friend who made the stole suggested meandering quilting with gold metallic thread.

Eme's stole eme and muriel

I used Superior gold metallic thread in the needle and tawny WonderFil from their Invisafil line in the bobbin.

close up front closeup back

I could not have been more pleased with the thread. I’ve been using Superior threads for a long time. Their metallics are in my opinion, the best available. The company suggests a 90/14 topstitch needle, and a tension setting of 1. I have never found the need to dial the tension lower than 2.5, but that is something you would need to try with your machine and the specific quilt. I always do extensive testing for top and bottom tension before beginning a project.

Wonderfil brand thread is fairly new to me, but their Invasifil line is fantastic. It’s a 100 wt. poly thread that is about the thickness of human hair, maybe even cat hair. It’s strong,  and it is perfect for the top or bottom of your quilt when you only want the quilting design to show. When you use it in the top, you would want to use a 60 or 70 needle. I also used Invisafil when I hand stitched the binding to the back of the quilt.

It’s a joy to quilt when you can just sit and stitch and not have to worry about shredding thread and tension issues on the back of your quilt.

Friday, August 17, 2012

Summer’s Bounty, part 3

Last stop on the summer preservation tour, ripe tomato catsup.
This is different than the red stuff you squirt on a hot dog at a picnic. It’s chunky, spicy, and oh so delicious. I’ve been making this for years, but it recently joined others in my family in making it part of tomato camp. For the past seven years, my daughters have met at their aunt’s home to have a tomato canning marathon. I joined them a couple of years ago, and it’s lots of fun but a tremendous amount of work. We canned salsa, pizza sauce, chopped tomatoes, catsup, and gallons of juice. This year’s count was 275 jars of assorted product totaling  33.3 gallons.
I didn’t get enough catsup for gift giving, so I’m making some today.
You can use any variety of red tomatoes, but I prefer Romas because they are so meaty. I bought 5 dry quarts of Romas at the Farmers’ market.
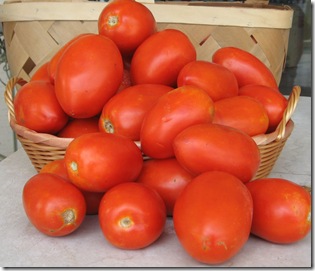
ripe tomatoes
Here’s the catsup recipe
1 peck of ripe tomatoes*, peeled, seeded and ground*if you are not into the bushel/peck measurement system, 3 quart jars of peeled, seeded, chopped tomatoes is just about right.
2 tablespoons of cinnamon
6 onions, ground
2 teaspoons allspice
1 tablespoon ground hot pepper
1 tablespoon salt
2 cups vinegar
2 pounds brown sugar
1/4 teaspoon celery seed
To facilitate skinning the tomatoes, drop them in boiling water for a few seconds.
skinning
The skinning is easy, but the seeding is labor intensive. It’s a lot more fun to do it with friends or family.
After the tomatoes are skinned and seeded, grind tomatoes and onions using a vintage food grinder
food grinder

Don’t have a vintage food grinder? a food processor will work just fine. Be sure not to process too much, you want the finished product to be chunky. You may want to grind the onions and tomatoes separately as they will process differently.


Drain ground tomatoes and onions for about an hour, then mix in other ingredients. Bring to a boil stirring constantly. Reduce heat and simmer at least 40 minutes until thick.  This recipe will make about 7-8 pints
cooking catsup
No need to use a pressure or water bath canner, just fill clean hot jars with the catsup, screw on the two part lid and wait for the ping that indicates the jar has sealed. Patti Wagon describes the process here. She’s making salsa, but the process is the same for the catsup.
Ready! I found some 4 oz. jars; just perfect for a sample.
tomato catsup jarred
How do I  use the catsup?
On home grilled hamburgers, my favorite way!
Meatloaf. Make this humble entree sing by adding a dollop of catsup to each serving. Tom’s favorite way! Hmm. need to make some meatloaf for him
Pour over a block of softened cream cheese when you need take an hors d’oeuvre to a party. The hostess would love to have a jar as a gift.
Enjoy!

Wednesday, August 15, 2012

Summer’s Bounty, Part 2

Next stop on the summer preservation tour, peach honey.
I have often said that if I had to live on just one food, it would be peaches. I love them any way they are prepared. If you can still get peaches at your local farmers’ market, here’s a recipe for yummy peach honey.
I went from this step
peaches
to 14 half pints of delicious peach honey
peach honey
By following the directions at the Patti Wagon blog.
Other than giving it to friends, here are some of the ways I plan to use it.
Mix with mayonnaise and a bit of curry for a chicken salad dressing, yum, add red grapes and slivered almonds
Glaze grilled pork or chicken
Use as a topping ice cream or pound cake..add rum
Add to Dijon mustard and olive oil for a honey mustard salad dressing
Pour over a block of cream cheese and serve with crackers

If you still have some fresh peaches left over, make this salad for dinner
1 cup sliced peaches (if you don’t have peaches, use melon)
1 cup chopped tomatoes, any variety
1 avocado cubed
1T olive oil
½ lime, juiced
Salt and pepper
Combine all ingredients and toss until juices combine
peach, tomato and avocado salad